Tracking custom events using class attributes
The most flexible way to start tracking custom events is by using our JavaScript API and calling koko_analytics.trackEvent() whenever needed.
But there is another way to wire up custom event tracking. One that doesn’t require you to leave the comfort of your post editor.
Here are the steps needed to start tracking custom events such as button clicks, form sign-ups using class attributes.
1. Add a class attribute to the element you want to track
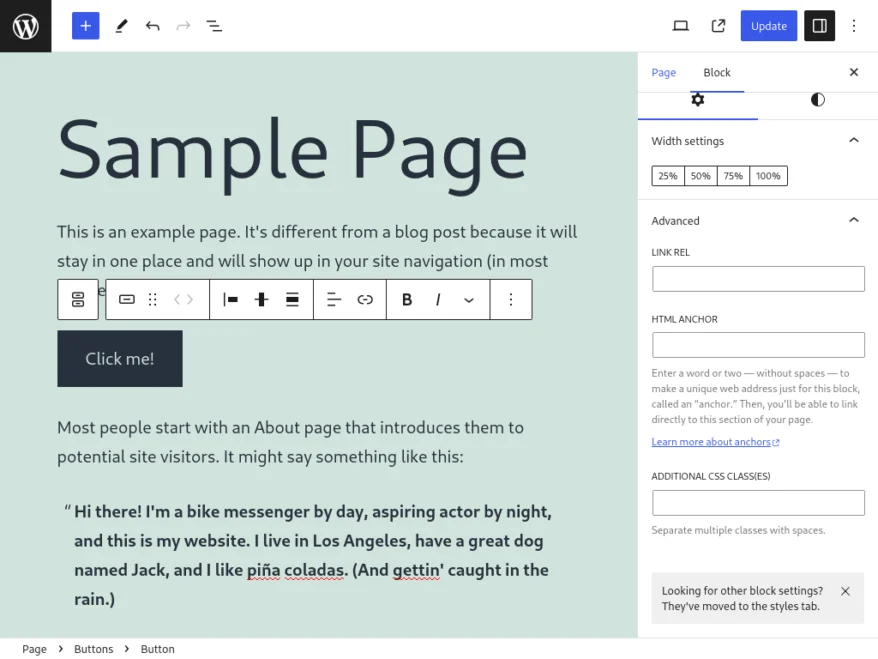
In the post editor, click on any block element you want to track such as a button or a form. This will open up the block menu on the right-hand side of your screen.
Click on “Advanced” and locate the “Additional CSS class(es)” field in the section that opens up, near the bottom of the right hand side of the screen.
If your event name is “Button click”, add a CSS class name in this format: koko-analytics-event-name=Button+click. Make sure to replace any spaces with a + sign.
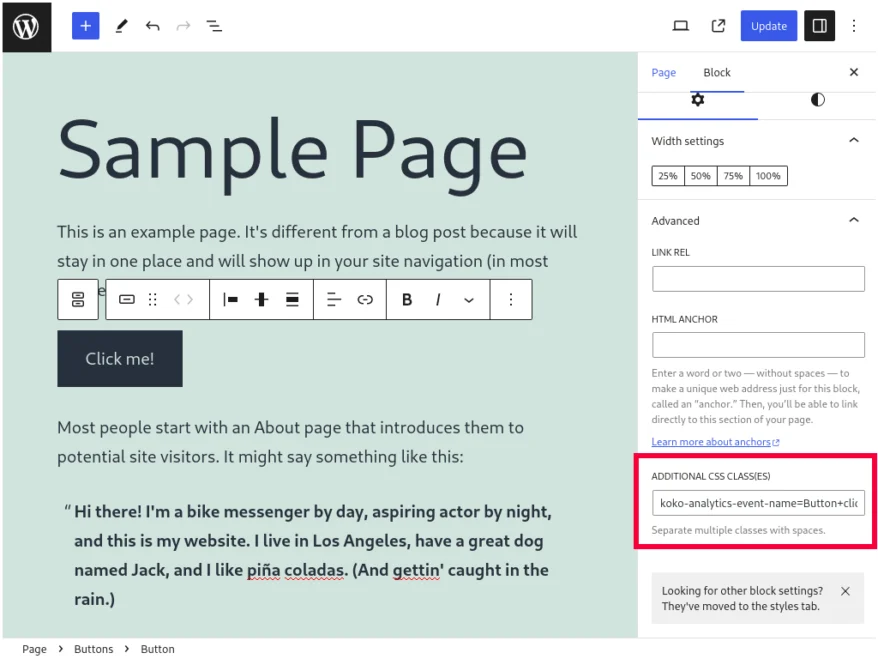
After updating your post, Koko Analytics Pro will automatically detect this new CSS class name and whenever that button is clicked, track an event with the name “Button click”.
Make sure that the part after koko-analytics-event-name= matches the name of your previously created event exactly, replacing any spaces with the + sign.
Adding event parameters
You can add custom event parameters in much the same way. Locate the element that you added the koko-analytics-event-name=Event+Name+Here class too and add another class in the following format: koko-analytics-event-param=Param+here.
For example, to track an event named Button click with parameter From the sample page, you would add the following in the “Additional CSS Class(es)” setting:
koko-analytics-event-name=Button+click koko-analytics-event-param=From+the+sample+pageAdding the class attribute in HTML
If you have access to the HTML of your site then you can also add these class attributes directly in HTML. For example:
<!-- before -->
<button>Click me!</button>

<!-- after -->
<button class="koko-analytics-event-name=Button+click">Click Me</button>Code language: HTML, XML (xml)
Another example but with a parameter:
<!-- before -->
<button>Click me!</button>

<!-- after -->
<button class="koko-analytics-event-name=Button+click koko-analytics-event-param=From+the+sample+page">Click Me</button>Code language: HTML, XML (xml)